Maker Cart 101
How Old High Middle School made making mobile in the Bentonville middle school.
[guest post by Tina Hoisington, Literacy Interventionist at Old High Middle School in Bentonville]
So, you're an educator and you and your team are curious about making your very own Maker Cart? With these helpful tips and tricks from the MakerSpace Committee at Old High Middle School, you can make your Maker Cart Dream a reality?
What is a Maker Cart?
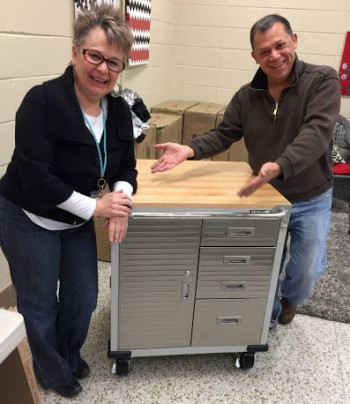
 A Maker Cart is a customizable portable maker station with all the necessary maker materials. It moves with you or a colleague to the location you choose. Say you want to bring your makerspace to another classroom, or share your materials with another room? Just wheel out your Maker Cart and let the making begin!
Old High's Makerspace Committee's Steps and Materials for creating a Maker Cart:
- Try a couple of maker projects in your classroom/makerspace or talk with an experienced colleague about what projects they have done.
- Determine what materials you need. We used our "most likely to be borrowed from us or from the makerspace" list and were very intentional in determining what size-type of cart, cabinet, tote we wanted. We eventually settled on our beautiful tool carts because they gave us the most versatility and bang for the buck. The size of the storage space will also determine what you can put in your cart and what can be shared or must be individual.
- Determine Your Needs: Cart (the big expense), tools/non-consumable parts and pieces, consumables.
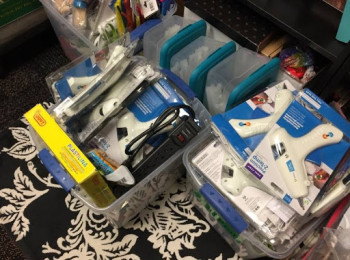
- Create the Cart: Order materials (we shopped for discounts at Walmart, online, and other discount stores. Label and inventory materials, plan for restocking and revising the materials, then build and stock the carts and you're rolling.
"Putting the carts together was truly a team effort. The Makerspace Committee determined what would go in the cart and ordered materials, but faculty, staff, and a spouse or two helped sort, build, label, and stock the carts. A lot of hands were involved. As you can see from the pictures everyone helped. From coach to counselor, nurse to students - everyone was hands-on." - Tina Hoisington, Literacy Interventionist
 Follow these simple guidelines and you too can build you Maker Cart in no time! As you work, don't be afraid to experiment by adding or subtracting different tools and materials. We've included a chart below with details of the tools/non-consumables, consumables, and the quantities recommended, pricing, and where to get them.
|
Tools/Non-consumables |
Quantity |
Source |
Price Per Item |
Notes |
| Hot Glue Gun | 7 | online | Borrowed frequently | |
| Carbo Titanium Scissors | 7 | online | Perfect for cutting cardboard - borrowed frequently | |
| Cardboard Cutters | 7 | online | Use under direct adult supervision (count after class) | |
| Shoebox | 1 | Walmart | ||
| Powerstrip | 1 | online | ||
| Betty Crocker Scissors | 5 | discount store | $1 | |
|
Consumables |
||||
| Craft Sticks | 1 pkg. | discount store | $1 | |
| Clothespins | 6 | discount store | $1 for 36 | |
| Masking Tape | 2 rolls | Walmart | ||
| Googly Eyes | 5 pkgs. | discount store | $1 | |
| Chenille Sticks (aka pipe cleaners | 4 pkgs. | discount store | $1 | |
| Glitter Chenille Sticks | 1 pkg. | discount store | $1 | |
| Feathers | 1 pkg. | Walmart | ||
| Wax Paper | 1 box | Walmart | ||
| File Labels | 1 pkg. | discount store | $1 | |
| Pompoms | 1 pkg. | discount store | $1 | |
| Sharpies | 14 | discount store | $1 | |
| Plastina Modeling Clay | 1 box | online | ||
| Toothpicks | 8 jars | discount store | 2 jars $1 | |
| Duct Tape | 1 roll | Walmart | ||
| Clear Tape | 2 rolls | discount store | $1 each |
Thank you to the Makerspace Committee at Old High Middle School for giving all of their students this on-the-go opportunity for Making and providing valuable input into the supplies needed take making to the classes.


